Cost codes are a group of individual costs based on their nature or function. They usually consist of numeric characters with an account title. These make it easier to find the cost of a job. For example, costs related to framing and drywall are classified under Framing Expenses with a cost code of 0001. Cost coding is used to facilitate easy classification of costs… A cost code might consist of digging a trench, laying sewer pipe, installing connections, or setting manholes. Each of these cost codes individually are the key to providing your company with real, accurate decision-making data.
Specific types of work being performed can also be drilled into using cost codes. For example, it would be valuable for an excavator to know the labor expense of excavating a basement versus the backfill and compaction. Or a concrete contractor might want to know how much he’s spending on footings and foundations versus slab on grade or curb and gutter. That information allows contractors to know the bid was on point or helps a team become more efficient at particular types of work.
The coolest thing about cost codes is that you can use them to get the data YOU need to make the best decisions possible for your company. It doesn’t matter if a company has five guys in the field or 500. Cost codes can be a 40,000-foot view into your project, or you can get down into the weeds. They can also be grouped into common categories or set up to mirror bid line items.
In order to get the most out of using cost codes, you need to be able to accurately track your employee’s time. They won’t be very beneficial if employees are guessing how much time they have spent on a project. The code cost won’t be accurate, therefore generating inaccurate reports. Using a time tracking software like busybusy, will ensure cost codes are user-friendly and beneficial for generating reports.
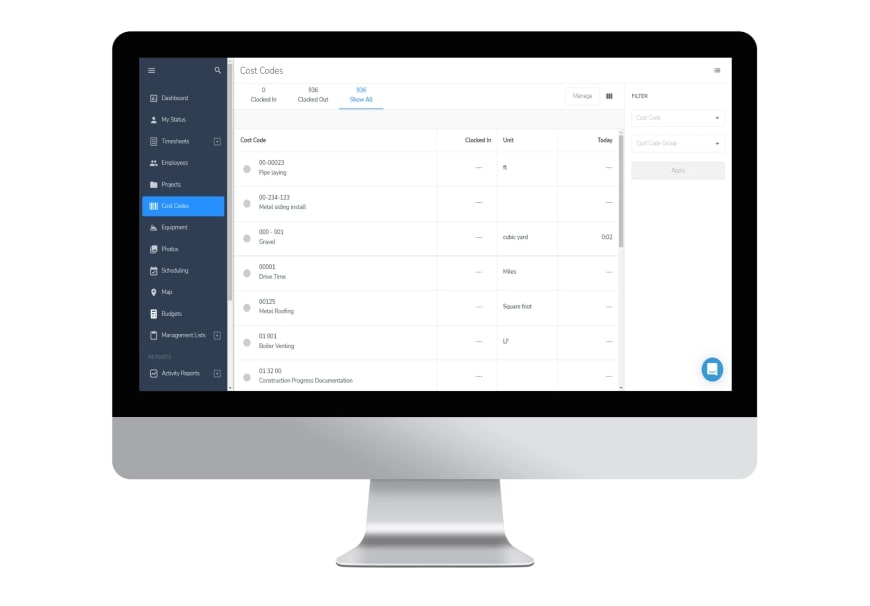
Below is an example of different cost codes a business can have.
How to Create a Cost Code Structure
Step One: Make some decisions about what you need out of a cost code
What information is crucial for you to know?
For example, do you need to know if one phase of the job costs more than the next? Or is it the breakdown between material and labor that you need to get a handle on?
- Check out the standard formats developed by AIA, NAHB, and CSI to see if any of them fit your needs.
- If none of the above structures work for you (specialty contractors will find them too broad), then create your own! Here are some samples to inspire you!
Who needs to be involved in creating your structure?
It’s always a good idea to have someone from each part of the process involved, i.e., accounting, bidding, and production. These cost codes need to make it easier for everyone involved.

Step Two: Create the cost code structure
Start with what you have.
If you’ve decided to format the codes to follow your bid structure, pick a recent bid and use it as a reference to get your outline started.
- Look for places to condense. If you have two widgets outlined in the bid, but knowing the data behind them independently isn’t essential to you or anyone else on the team, condense them!
- Don’t try to build the system to cover everything you might ever do. You can add more codes as you need to.
- Keep it simple!!! The guys in the field need to understand the structure, and there are usually more of them!
- If a code/account/bid item exists but isn’t used, now is the time to dump it!
- Consider your production process and order your cost codes in the same manner you would build the job.
- Most ERP and accounting systems allow you to map your cost codes to the existing ones in documents like RFPs and pay applications, so there’s no need to mirror these documents when designing the structure. Instead, create a system that works in the field.
Design a numbering system to keep everyone organized.
- Keep in mind that you’ll be adding codes along the way. Here is an example of a four-digit structure that leaves nine codes available between each set for additional detail.
- 00 – General
- 10 – Site Preparation
- 10.11 – Concrete Washout Installation
- 10.12 – Tracking Pad Installation
- A five-digit format allows 99 codes for future use
- 00 – General
- 10 – Site Preparation
- 10.101 – Concrete Washout Installation
- 10.102 Tracking Pad Installation
- 10.103 – Perimeter Fencing Installation
- Keep in mind that you’ll be adding codes along the way. Here is an example of a four-digit structure that leaves nine codes available between each set for additional detail.
Best Practices when creating a cost code structure:
- Limit the # of codes – less is best
- Use every code you create
- Don’t have placeholder codes for reference or as section titles
- If a code is created but never used, ditch it!
- Consider ALL of the stakeholders that will use the system, from the laborer to the bank. Then, create a plan that will make your project or work easier to understand for everyone.
- Create an outline for the cost code system that is:
- Well organized
- Easy to understand
- Consistent across projects
- Detailed enough to get the data needed to make decisions that will bring more money to the bottom line!
- Meaningful, if a sub-cost code seems like a good detail, but isn’t meaningful to anyone, stick with the primary cost code. Fewer sub-cost codes are easier to use, understand and maintain.